
GS375 Anti Two Block Sensor Linking Procedure
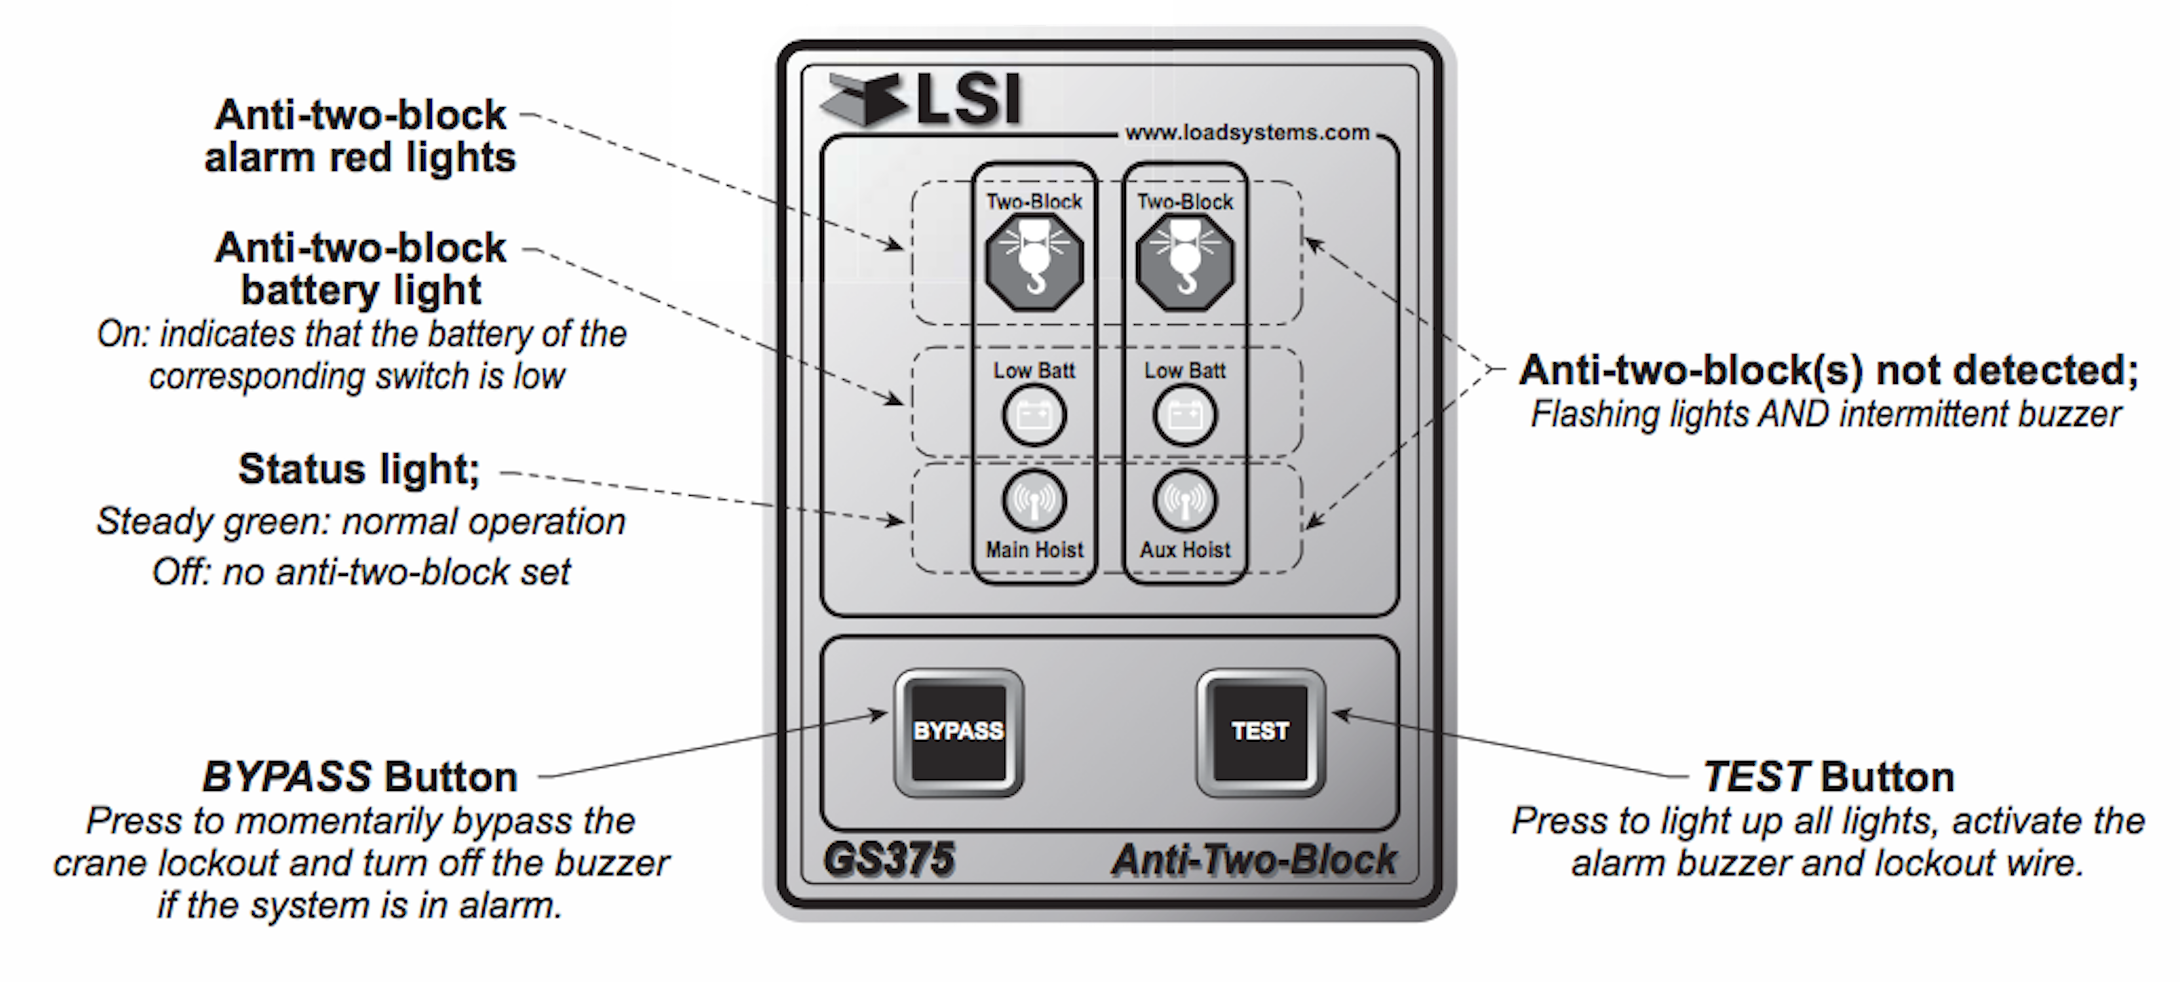
If A2B Switch is in Hand
- Press the Bypass & Test buttons simultaneously until the display beeps (about 5 seconds). The “main hoist” light will flash, to indicate that a new main hoist anti-two-block can be registered.
- Remove the battery from the main hoist anti-two- block switch and then reinsert the battery. The display should detect the new anti-two-block switch: it will beep and register the new ID number. The main hoist green light will stop flashing, the auxiliary hoist green light will start flashing. Repeat for the auxiliary hoist switch if required, or press the Bypass button to exit the learning mode.
- Test the programmed switch(es) to ensure the system functions as required.
If A2B Switch is on Boom Tip
- Press the Bypass & Test buttons simultaneously until the display makes a double beep, after about 10 seconds (ignore the single beep after 5 seconds). The “main hoist” light will flash.
- Wait 10 seconds; the display is now listening ready to register a new main hoist anti-two- block switch. Simulate repeated two-blocks with the main hoist switch. The switch should change state, from safe to alarm and back, several times. The display beeps when the new main hoist id number has been registered. The auxiliary hoist light now flashes.
- The display is now ready to register a new auxiliary hoist anti-two-block switch. Repeat two-block simulation with auxiliary hoist switch if required, or press the Bypass button to exit the learning mode.
- Test all programmed systems for correct system function.

GS320 Wind Speed Sensor Linking Procedure
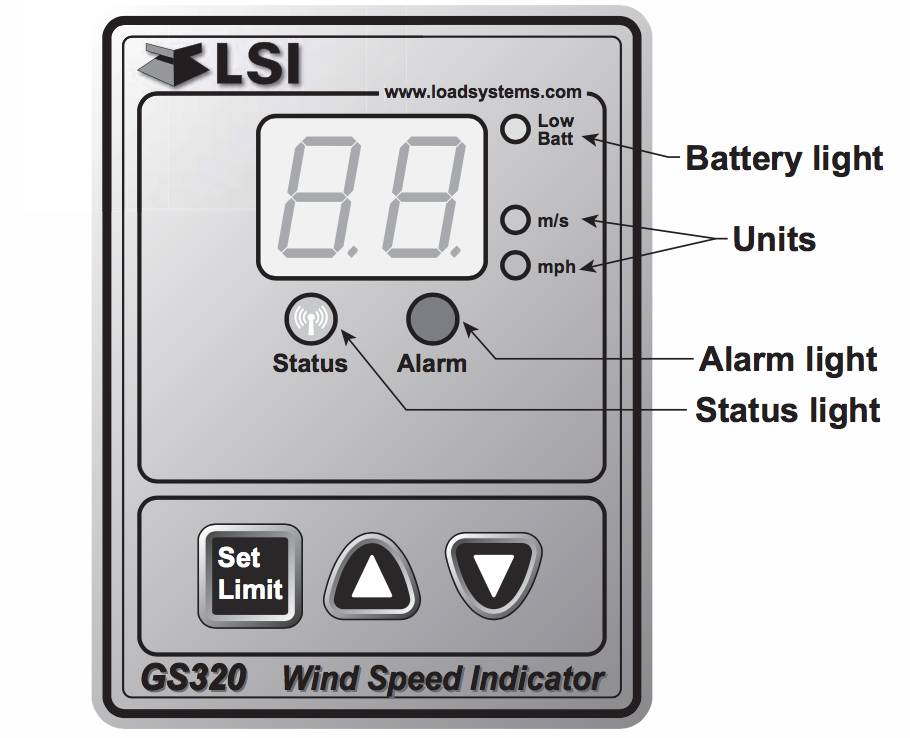
This Trimble LSI sensor linking procedure section describes how to manually change the ID number the GS320 will listen to, and how to change some other behavior of this display. Changing the wind speed ID number is required only if the wind speed sensor is changed and the display must be manually set to listen to an other one.
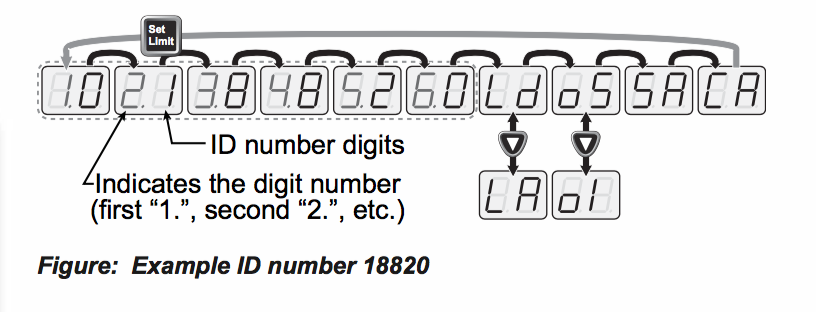
Press and hold the Up and Down buttons simultaneously for 5 seconds. The display will beep and then indicate the currently programmed wind speed sensor ID number, one digit at a time. The ID number must contain 6 digits, if the ID number is 120, the three first digits are “000”.
1. Press Set Limit button to change from one screen to the next.
2. To change a digit, use the Up and Down buttons:
“Ld” means Listening De-activated (default).Press Down to change to “LA”.
“LA” means Listening Mode Active. Another GS320 dislay must be the master of the wind speed sensor.
“OS” means Output Standard: fail safe output (default). The output provides power when wind speed is safe, below the limit. Press Down to change to “OI”.
“OI” means Output Inverted: the output wire is energized when wind speed is above the limit. This could be use to power an external siren or horn.
“SA” means Save. When this screen is displayed, press the Down button to save the ID number and above options and then exit.
“CA” means Cancel. Press the Down button to exit without saving. The system will retain the previously set ID number and options.
Example: if the ID number is 18820, it will appear like this on the screen:
Hopefully this Trimble LSI sensor linking procedure has been useful to you. As always the BTS Crane Parts team remains available to help at any point.


